
How to Remove Brembo Brake Calipers? – DIY Tutorial
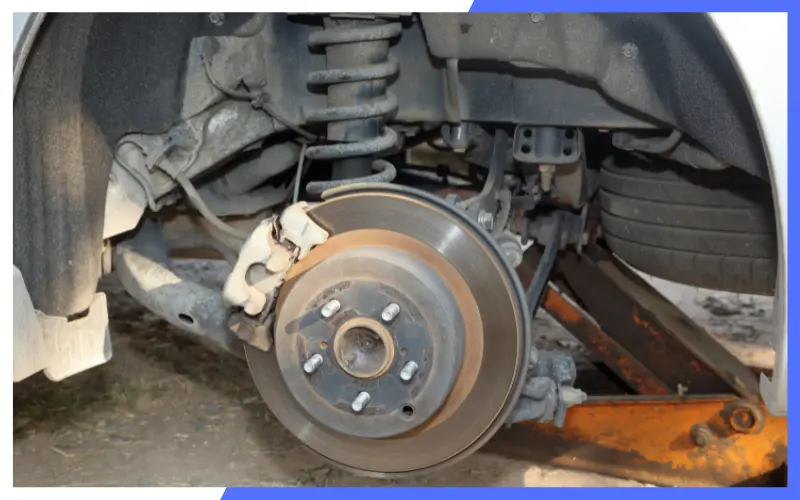
The brakes on motorcycles are usually attached using two bolts, one at each side of the wheel. These bolts are called “brake calipers.” They are located under the front wheel and are connected to the frame via a bracket.
When removing these calipers, it is important to ensure that you don’t damage the brake lines or pads. This is because the brake fluid is very expensive, and it can cause serious problems if damaged.
Table of Contents
How To Remove A Brembo Brake Caliper
While removing the caliper isn’t difficult, it’s important to be careful when removing the caliper.
Step 1: Remove the lug nuts from the wheel where the brake caliper is located.
If you are having trouble removing the caliper from the wheel, there may be a way of removing the lug nuts to which the caliper is attached. This may help you remove the caliper.
Step 2: Jack up the car and place it on jack stands.
In this step, you will jack up the car and place it on jack stands. Therefore, removing the caliper does not require removing the wheel.
Step 3: Remove the wheel.
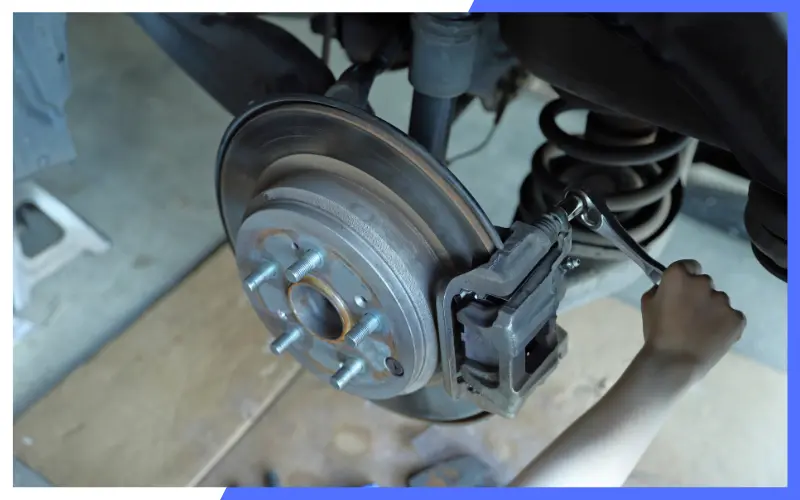
Removing a Brembo brake caliper is a relatively easy process, but it does require some skill and patience. First, you’ll need to remove the wheel and use a wrench to loosen the caliper bolts. Finally, use a crowbar to pry the caliper off the wheel.
Step 4: Remove the brake pads from the caliper.
The brake pads must first be removed from the caliper by removing the screws that hold them in place. The caliper pads can now be removed by removing the screws.
Step 5: Remove the caliper bolts and remove the caliper.
The final step in removing a Brembo brake caliper is to remove the bolts that hold it in place. Use a wrench to remove the bolts and a wrench or pliers to remove the caliper. When removing the caliper, be sure to wear gloves.
You have now successfully removed a Brembo brake caliper from a car.
Tips:
Ensure that you have a good grip on the caliper before attempting to remove it. The caliper may be stuck if it has sat for a long time.
You can also try heating the caliper with a blow torch to make removing it easier. The hair dryer may be the only option left if all else fails.
Ensure that you do not drop any parts while removing the caliper. It’s best to keep everything together until after removing the caliper. Also, make sure that you’re wearing safety glasses or goggles while doing this.
Do not attempt to remove the caliper if it has rusted. Rusting makes it harder to remove the caliper and could potentially damage your vehicle.
Before removing the caliper, check the condition of the bolt holes on the caliper. If they look like they were previously drilled into the metal, then you won’t be able to remove the caliper by hand. By drilling new holes, you can now insert a screwdriver into which you can remove the caliper bolts.
The easiest way to determine whether or not the holes are drilled correctly is to take a close look at them. You will probably need to drill new ones if they appear to be drilled oddly.
When drilling holes, make sure that you are using a drill bit that is compatible with your brand of brakes. For example, you should use a Honda Civic drill bit if you have a Honda Civic.
If you don’t know what kind of drill bit to use, you should ask someone who works on cars regularly. You might be able to get a recommendation from them.
Avoid using a hammer to drive the caliper bolts, which may cause the caliper to break apart and fall.
Make sure you have all of your tools ready before removing the caliper because there’s no guarantee that you’ll finish quickly.
How To Remove Brembo Brake Calipers From A 2016 Camaro Ss?
This process is more complicated than removing a Brembo caliper from a non-SS model. There are two different Brembos used on the Camaro SS, and one type uses a single-piston design, while the other uses a dual-piston design.
Step 1: Remove the wheel.
Remove the wheel by removing the lug nuts and wheel. Once the wheel is removed, use a flathead screwdriver to pry off the brake caliper bracket.
Step 2: Remove the brake pads.
If you have a 2016 Camaro SS, you will need to remove the brake calipers to replace them. First, locate the four screws securing the brake rotor’s calipers. Remove these screws, and the calipers will come off.
Step 3: Remove the caliper bolts.
The third step in removing the brake calipers from a 2016 Camaro SS is to remove the bolts that hold them in place.
Use a wrench to loosen the bolts and then use a socket wrench to remove them. Be careful not to lose the washers or bolts, as they are essential for re-installation.
Step 4: Remove the caliper.
To remove the Brembo brake calipers from a 2016 Camaro SS, you will need to remove the four bolts that hold the caliper in place. Once the bolts are removed, the caliper can be pulled off the rotor.
The caliper should be reinstalled after tightening the bolts to the proper specifications with a torque wrench.
Step 5: Install the new caliper.
The final step in this Camaro SS brake removal tutorial is to install the new caliper. First, remove the old caliper by unscrewing the bolts holding it.
Once the old caliper is removed, use a Phillips head screwdriver to remove the four screws that hold the new caliper in place.
Be sure to note the orientation of these screws before removing them so that you can re-install them in the correct orientation when replacing the caliper. Once the new caliper is in place, replace the screws and tighten them using a Phillips head screwdriver.
You have now learned to remove the Brembo brake calipers from a 2016 Camaro SS.
How To Remove Porsche 6 Pot & 4 Pot Brake Calipers Brembo
Frequently Asked Questions
Can you remove a caliper and still drive?
No, you cannot safely remove a caliper and still drive. The caliper is an essential component of the brake system; without it, the car cannot stop properly.
How do you release a caliper piston?
You will need a C-clamp or a caliper piston tool to release a caliper piston. Start by removing the caliper from the rotor. Then, locate the caliper piston, which is usually on the inside of the caliper. Place the C-clamp or caliper piston tool on the piston and slowly tighten it. This will push the piston back into the caliper, releasing the pressure and allowing you to remove the caliper.
What is a common mistake when replacing a caliper?
A common mistake when replacing a caliper is forgetting to bleed the brake system after installation properly. This can lead to reduced braking performance and potential safety issues.
Why is my caliper not releasing?
There are several reasons why a caliper may not be releasing. One common cause is a sticking caliper piston. This can be due to dirt, debris, or corrosion. Another possible cause is a malfunctioning caliper slide pin. If the slide pin is seized or worn, the caliper won’t be able to move freely. In some cases, a faulty brake hose can also prevent the caliper from releasing. It is important to diagnose and address the root cause of the issue to ensure proper brake function.
Is it OK to replace just one brake caliper?
While it is possible to replace just one brake caliper, it is generally recommended to replace them in pairs. This is because uneven braking can occur if one caliper is newer or has different characteristics than the other. It is best to ensure that both calipers are in good working condition to maintain consistent braking performance.
How do you tell if a caliper is good or bad?
There are a few signs that indicate a bad caliper. It could be a sign of a faulty caliper if you notice uneven brake pad wear, leaking brake fluid, or a spongy brake pedal. Additionally, if you hear a grinding or scraping noise coming from the brakes, it may indicate that the caliper is not releasing properly. It is always recommended to have a professional inspect and diagnose the issue to ensure proper repair.
Conclusion
I showed you how to remove a Brembo brake caliper from a motorcycle. This is a very simple job, but it does require a few tools. If you want the bolts to be tightened evenly, use a torque wrench.
I also recommend using a hacksaw blade to cut through the bolt heads. Once the caliper is off, you will need to pull the brake pads away from the rotor. Then you will need to replace the brake pads and adjust the brakes.
I hope you enjoyed this video and found it helpful. I am happy to answer any questions or comments you might have.