
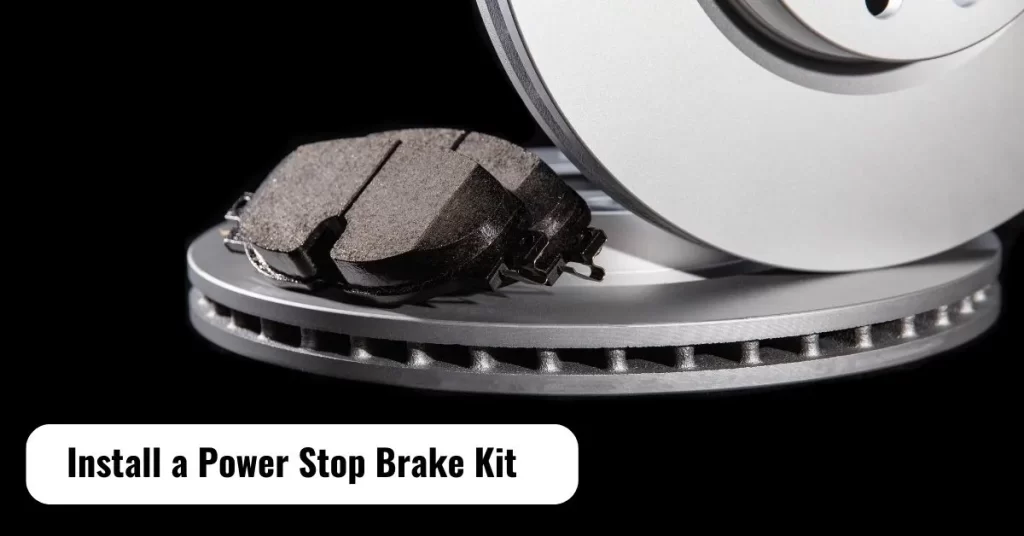
The Complete Guide on How to Install a Power Stop Brake Kit
Tired of your car’s old, worn-out brakes that make scary squeaking noises every time you hit the pedal? Looking for a cost-effective way to upgrade your vehicle’s stopping power without breaking the bank? A Power Stop Brake Kit may be just what you need.
Are you tired of your old, worn-out brake calipers and ready for an upgrade? Look no further than the Power Stop Brake Kit. This kit includes everything you need to give your vehicle the stopping power it deserves, including high-performance brake calipers. Installing a Power Stop Brake Kit is easier than you may think. With a few tools and some patience, you’ll be back on the road with a smoother and safer ride in no time. In this guide, we’ll walk you through installing your new brake calipers and get you stopping on a dime. So, let’s get started!
How to Install a Power Stop Brake Kit: In 12 Step
Tools You May Need:
| Parts and Tools | Description |
|---|---|
| PowerStop brake pads | High-quality brake pads designed for your specific vehicle |
| PowerStop rotors | High-performance rotors that match the specifications of your vehicle |
| Brake fluid | Fluid specified in the owner’s manual for proper brake system operation |
| Brake component lube | An alternative tool for compressing the caliper piston |
| Caliper piston compressor | Equipment used to lift and support the vehicle during the installation safely |
| C-clamp | The tool used to compress the caliper piston back into the caliper body |
| Jack and jack stands | Jack and Jack stands |
| Wheel chocks | Devices placed behind the wheels to prevent the vehicle from rolling |
- Gather the necessary parts and tools: You’ll need power stop brake pads, power stop rotors, brake fluid as specified in the owner’s manual, brake component lube, a caliper piston clamp or seat clamp, a jack and jack stands, safety glasses, and gloves.
- Prepare the vehicle: Ensure the vehicle is in the park position on a hard, level surface. Check the brake fluid level at the reservoir, which should be about half full.
- Lift the vehicle: Before raising the vehicle, loosen the lug nuts on the wheels just enough to break them free. Lift the vehicle using a jack and support it with jack stands at the proper jacking points specified by the manufacturer. Never rely solely on a hydraulic jack to hold the vehicle.
- Remove the wheel: Remove the lug nuts and the wheel. Working on one wheel at a time is best, leaving the other side intact as a reference point. Place the wheel and tire assembly under the vehicle as a safety precaution.
- Inspect and remove components: Inspect the brake components for leaks or damage. Remove the caliper guide pin bolts that hold the caliper onto the bracket. Support the caliper with a brake caliper hanger or wire hanger, ensuring it doesn’t hang from the brake hose.
- Remove the old pads and rotor: Remove the pads and caliper bracket bolts. Check for retaining screws that may hold the rotor to the hub. If present, remove the screws. Tap the rotor with a mallet if it’s stuck due to rust or corrosion.
- Compress the caliper piston: Use a piston compressor or large C-clamp to compress the caliper piston. Place a used brake pad over the face of the piston to protect it. Slowly compress the piston until it becomes flush with the surrounding metal.
- Clean and install the new rotor: Clean the face of the hub with a wire brush and apply a thin film of anti-seize. Clean the new rotor with mild soap and water, then wipe it clean. Install the new rotor, ensuring proper indexing and checking for lateral run-out.
- Replace hardware and install new pads: Clean rust from the caliper bracket and inspect/replace the hardware as needed. Apply brake lube to the guide pins and pad contact points. Install the caliper bracket and torque the bolts. Apply a small amount of brake lube on the back of the pads, avoiding the friction side. Install the new pads.
- Reinstall the caliper and bleed the brakes: Install the caliper, making sure not to twist the brake hose, and torque the bolts. Bleed the brakes to remove any air from the system. Refer to the factory service manual for the proper bleeding procedure.
- Reinstall the wheel and lower the vehicle: Install the wheel and lug nuts. Lower the vehicle back onto the ground and finish tightening the lug nuts to the manufacturer’s specified torque.
- Repeat for other wheels: Repeat the above steps for the remaining wheels.
How Long Does Power Stop Brakes Last?
The lifespan of Power Stop brakes can vary depending on several factors, including driving habits, vehicle usage, and environmental conditions. On average, Power Stop brake pads can last between 30,000 to 70,000 miles, while the rotors can last significantly longer, often exceeding 70,000 miles or more. However, it’s important to note that these estimates are general guidelines, and actual mileage may vary.
The longevity of Power Stop brakes also depends on factors such as your driving (city driving versus highway driving), your braking habits (aggressive braking versus smooth braking), and your braking system’s overall maintenance and care.
Regular inspections and maintenance are crucial for maximizing the lifespan of your brakes. Monitoring brake pad thickness periodically is recommended, and replacing them when they reach the minimum recommended thickness. Additionally, maintaining proper brake fluid levels and addressing any brake system issues promptly can help extend the lifespan of your Power Stop brakes.
Ultimately, the longevity of Power Stop brakes is influenced by various factors, and individual experiences may vary. It’s essential to follow the manufacturer’s recommendations, practice good driving habits, and conduct regular maintenance to ensure optimal performance and longevity of your brake system.
tips and tricks to install stop brakes
When installing Power Stop brakes, here are some tips and tricks to help you achieve a successful installation:
- Read the instructions: Carefully read and understand the installation instructions provided by Power Stop. Each brake kit may have specific requirements and steps to be followed.
- Gather the right tools: Ensure you have all the tools and equipment mentioned in the instructions, such as a torque wrench, brake caliper piston compressor, and appropriate sockets or wrenches.
- Prepare the workspace: Work in a clean, well-lit area. Consider using a mat or cardboard to protect the surface and prevent any damage to the components.
- Take safety precautions: Wear safety glasses and gloves to protect yourself during the installation process. Follow proper lifting and supporting procedures to ensure your safety.
- Cleanliness is key: Thoroughly clean the brake components, including the calipers, brackets, and rotor mounting surfaces, before installation. Use brake cleaner or an appropriate solvent to remove dirt, debris, or old brake pad material.
- Lubricate as instructed: Apply brake component lube to the specified areas mentioned in the instructions, such as the guide pins and pad contact points. This will ensure smooth and quiet operation of the brakes.
- Proper torque specifications: Follow the manufacturer’s recommended torque specifications when tightening bolts, calipers, and lug nuts. Use a torque wrench to achieve the correct torque levels and prevent overtightening or under-tightening.
- Bleed the brakes: If required, perform a brake bleeding procedure after the installation to remove any air from the brake system. Follow the proper bleeding sequence and technique specified in the vehicle’s service manual.
- Break-in period: After installation, allow for a proper break-in period as recommended by Power Stop. This typically involves a series of moderate stops to properly seat the brake pads and ensure optimal performance.
- Regular maintenance: After installation, regularly inspect the brakes for wear, proper operation, and any signs of issues. Keep the brake components clean and perform routine maintenance as recommended by the manufacturer.
Remember, if you are uncertain or uncomfortable with any aspect of the brake installation, it’s always recommended to seek professional assistance from a qualified mechanic or technician. They can ensure proper installation and address any specific requirements or challenges related to your vehicle.
Frequently Asked Questions
Are Powerstop brakes good for towing?
Yes, Powerstop brakes are good for towing. The brake pads and rotors are designed to provide superior stopping power and performance in all conditions, including when towing heavy loads. They also feature a corrosion-resistant coating that helps protect against rust and wear. Additionally, the pads are made from a high-friction material that provides excellent braking performance even in wet conditions.
Are Powerstop Z23 brakes good?
Yes, Powerstop Z23 brakes are good. The Z23 brake pads and rotors feature a unique carbon-fiber ceramic formula that provides superior stopping power and performance. Additionally, the pads are designed to reduce noise and dust while providing excellent braking performance in all conditions. The rotors also feature a corrosion-resistant coating that helps protect against rust and wear.
What happens if you don’t bed in brakes?
If you don’t bed in your brakes, it can lead to poor braking performance and increased noise. Bedding in the brakes helps to create a layer of the friction material on the rotor surface that helps to reduce brake noise and improve braking performance. Additionally, it helps to ensure that the pads are properly seated against the rotor for maximum stopping power.
How often should I replace my Powerstop brakes?
You should replace your Powerstop brakes every 50,000 miles or as needed. However, it is important to inspect your brakes regularly and replace them if they show signs of wear or damage. You should also have your brakes inspected by a professional mechanic at least once a year to ensure they are in good condition.
How do I know when my Powerstop brakes need to be replaced?
You will know when your Powerstop brakes need to be replaced if you notice any of the following signs: decreased braking performance, increased brake noise, or visible wear on the brake pads or rotors. Additionally, it is important to have your brakes inspected by a professional mechanic at least once a year to ensure they are in good condition.
Conclusion
By now, you must have understood that driving safely with Power Stop’s braking system is not easy. This brake kit is designed to ensure smooth and comfortable braking without any drama. It also comes with a lifetime guarantee which means you can be at ease about the performance of this product. This brake kit will give your car an extra edge when it comes to safety. Now that you know everything about this amazing product, make sure to install it as soon as asked in the article.