
How Long Does it Take to Flush Brake Fluid?-10 Sign To Change
Imagine confidently cruising down the road, seamlessly transitioning from speed to a controlled stop. Your vehicle’s braking system is at the heart of this safety equation, ensuring you have the power to halt when needed. Over time, however, brake fluid can accumulate moisture and contaminants, compromising the effectiveness of your brakes. Enter the rejuvenating process of brake fluid flushing – a key maintenance ritual that restores your braking system’s prowess.
In this guide, we delve into the art of flushing brake fluid, demystifying the steps that lead to enhanced safety and performance. Join us as we unveil the science behind the process and provide insights into the duration required to complete this vital maintenance task. Get ready to embark on a journey that preserves your vehicle’s stopping power and elevates your driving experience to new heights.
Table of Contents
How long does it take to flush brake fluid?
The time required to flush brake fluid can vary based on several factors, including the type of vehicle, the number of brake lines, the condition of the existing brake fluid, and the equipment used. On average, a brake fluid flush can take anywhere from 30 minutes to 1 hour. However, it’s important to note that this is a general estimate, and the actual time may differ in specific situations. Here’s a breakdown of the process and the factors that can influence the duration:
- Preparation (5-10 minutes): This involves gathering the necessary tools and materials, lifting the vehicle if needed, and ensuring a safe and well-ventilated workspace.
- Brake Line Bleeding (30-60 minutes): The main step involves removing the old brake fluid from the brake lines and replacing it with fresh fluid. This process typically requires a partner to assist with pumping the brake pedal while the old fluid is expelled.
- Multiple Brake Lines (Additional Time): Each line must be flushed individually if your vehicle has multiple brake lines (e.g., front and rear). This can add to the overall time required for the process.
- Caliper and Reservoir Cleaning (Variable Time): Depending on the condition of the calipers and reservoir, you might need to spend extra time cleaning them before installing the new brake fluid.
- System Bleeding and Testing (10-15 minutes): After flushing the brake fluid, the system must be properly bled to remove any air bubbles. Additionally, testing the brakes to ensure proper functionality is an essential step.
- Cleanup and Inspection (5-10 minutes): Once the process is complete, cleaning up the workspace and inspecting for any leaks or issues is necessary to ensure a successful brake fluid flush.
Remember, the duration can vary based on your experience level, the tools you have available, and any unforeseen challenges that may arise during the process. If you’re not familiar with brake maintenance procedures, it’s recommended to consult your vehicle’s manual or seek professional assistance. Properly maintaining your brake fluid is essential for ensuring safe and reliable braking performance, so it’s worth investing the necessary time and effort into the process.

How often should you flush your brake fluid?
The best way to determine how often you should flush your brake fluid is by checking your owner’s manual. Most manuals recommend changing the brake fluid every two years. However, some vehicles may not require brake fluid changes until after five years. For example, if you drive many miles yearly, you might want to change the brake fluid sooner. Checking with your mechanic before making any major repairs is always recommended. He or she will be able to tell you whether or not you need to replace the brake fluid.
What are the benefits of flushing your brake fluid?
Flushing brake fluid is a good idea for several reasons. First, it ensures that all the contaminants are removed from the fluid. Second, it ensures that the brake system works properly. Third, it reduces the risk of overheating the brake fluid. And lastly, it prevents corrosion from forming inside the brake lines. Overheating is a big concern. If the brake fluid gets too hot, it could cause damage to the brake system. In addition, it could make the brake feel mushy.
Corrosion is another problem if you don’t flush the brake fluid. Corrosion occurs when metal parts come into contact with water. This causes rusting, which damages the brake system. Over time, brake fluid becomes contaminated. Contaminants like dirt, dust, and even tree sap can build up in the brake fluid. These contaminants reduce the effectiveness of the brake system.
10 Signs That You Need a Brake Fluid Flush
Ensuring the health and functionality of your vehicle’s braking system is essential for your safety on the road. Here are 10 signs that indicate it might be time for a brake fluid flush:
- Brake Pedal Feel: If the brake pedal feels soft, spongy, or requires more effort to engage, it could be a sign of air or moisture in the brake fluid.
- Longer Stopping Distances: If your vehicle takes longer to come to a complete stop, it could be due to decreased brake fluid performance.
- Brake Fluid Color: Brake fluid is typically clear or light yellow. If it appears dark, brown, or murky, it’s an indication that contaminants have built up, and a flush is needed.
- Brake Warning Light: If the brake warning light on your dashboard is illuminated, it could signify a brake fluid issue that requires attention.
- Burning Smell: A burnt smell while driving could indicate overheated brakes due to old or contaminated brake fluid.
- Noisy Brakes: Squealing, squeaking, or grinding noises when braking can indicate worn brake pads or contaminated fluid affecting brake components.
- Vibration or Pulsation: If you feel vibrations or pulsations in the brake pedal when applying the brakes, it could suggest uneven brake pad wear or air bubbles in the brake lines.
- Brake Fluid Leaks: Visible leaks near the wheels or under the vehicle might indicate deteriorated brake lines or seals requiring a fluid flush.
- Difficulty Braking in Wet Conditions: If your brakes feel less responsive when driving in wet conditions, it could indicate water-contaminated brake fluid affecting braking performance.
- Inconsistent Braking: If the brakes engage inconsistently or differently each time you apply them, it might indicate air or moisture affecting the brake fluid’s hydraulic function.
If you notice any of these signs, it’s important to address them promptly. A brake fluid flush can help maintain optimal braking performance and ensure your safety on the road. Consult your vehicle’s owner’s manual or seek professional assistance to determine the best action based on your circumstances. Regular brake system maintenance, including periodic brake fluid flushes, is essential for a reliable and responsive braking system.

Also Learn: When is a Brake Fluid Flush Necessary
What type of brake fluid should you use?
| Brake Fluid Type | Characteristics | Common Uses |
|---|---|---|
| DOT 3 | – Glycol-based | – Everyday vehicles |
| – Boiling point: around 205°C (401°F) | – Light to moderate braking | |
| – Absorbs moisture over time, leading to reduced lifespan | – Older vehicles | |
| – Compatible with rubber seals and components | ||
| DOT 4 | – Glycol-based | – High-performance vehicles |
| – Boiling point: around 230°C (446°F) | – Heavy-duty braking | |
| – Higher boiling point than DOT 3 | – Vehicles with ABS | |
| – Absorbs moisture like DOT 3, but to a lesser extent | ||
| – Compatible with rubber seals and components | ||
| DOT 5 | – Silicone-based | – Classic cars |
| – Boiling point: around 260°C (500°F) | – Vehicles that sit for long periods | |
| – Non-hygroscopic (does not absorb moisture) | – High-temperature applications | |
| – Not compatible with glycol-based fluids | – Limited use in modern vehicles | |
| DOT 5.1 | – Glycol-based | – High-performance vehicles |
| – Boiling point: around 260°C (500°F) | – Heavy-duty braking | |
| – Higher boiling point than DOT 3 and DOT 4 | – Vehicles with ABS | |
| – Minimal moisture absorption | ||
| – Compatible with rubber seals and components | ||
| Mineral Oil | – Petroleum-based | – Some mountain bike hydraulic systems |
| – Boiling point varies by brand and formulation | – Hydraulic bicycle brakes | |
| – Non-hygroscopic (does not absorb moisture) | – Incompatible with DOT brake fluids | |
| – Not interchangeable with DOT fluids |
It’s important to use the correct type of brake fluid specified by your vehicle’s manufacturer. Using the wrong type of brake fluid can lead to braking system issues and potential safety hazards. Always refer to your vehicle’s owner’s manual for the recommended brake fluid type, and consult a professional mechanic if you’re unsure.
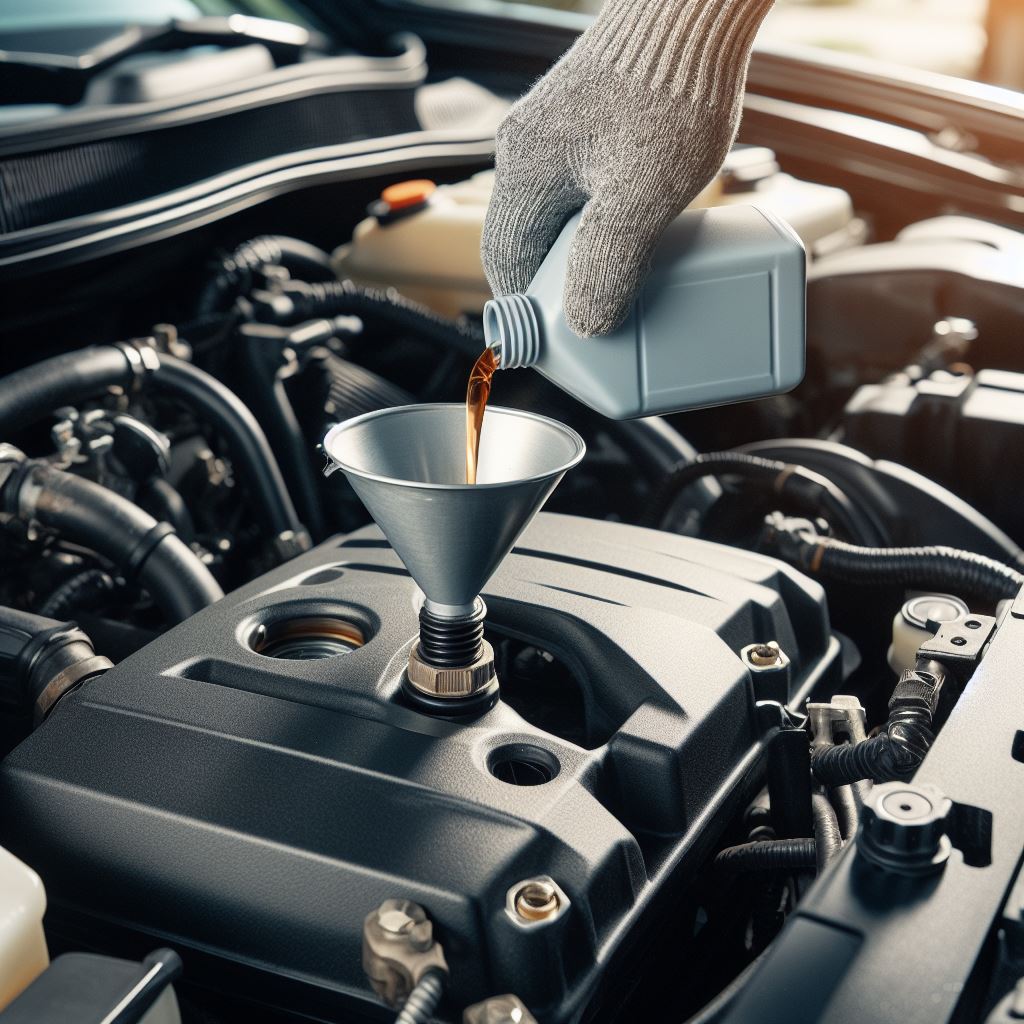
The Right Way to Flush Brake Fluid
Flushing brake fluid is a maintenance procedure that involves removing old, contaminated brake fluid from the system and replacing it with fresh fluid. This helps maintain optimal braking performance and extends the life of your brake components. Here’s a step-by-step guide on how to flush brake fluid:
Materials You’ll Need:
- New brake fluid (specified by your vehicle’s manufacturer)
- Jack and jack stands or ramps
- Lug wrench
- Brake fluid catch container
- Clear vinyl tubing (for bleeding)
- Wrenches (size varies based on your vehicle)
- Turkey baster or brake fluid syringe (for removing old fluid)
- Helper (for pumping the brake pedal)
Step-by-Step Guide:
- Prepare Your Workspace:
- Park your vehicle on a level surface and engage the parking brake.
- Wear safety goggles and gloves to protect your eyes and skin from brake fluid.
- Elevate the Vehicle:
- Use a jack, and jack stands or ramps to lift the vehicle off the ground. Ensure it’s secure before working underneath.
- Access the Brake Fluid Reservoir:
- Open the hood and locate the brake fluid reservoir. It’s usually near the firewall, close to the master cylinder.
- Remove Old Fluid from the Reservoir:
- Suck out as much old brake fluid as possible using a turkey baster or brake fluid syringe. Avoid letting brake fluid spill on painted surfaces, as it can damage the paint.
- Fill the Reservoir with New Fluid:
- Refill the reservoir with the recommended new brake fluid until it reaches the “MAX” or “Full” line. Use the type of fluid specified in your vehicle’s owner’s manual.
- Bleed the Brake Lines:
- Start with the brake farthest from the master cylinder (usually the rear passenger side). Attach a piece of clear vinyl tubing to the bleeder valve on the brake caliper.
- Place the other end of the tubing into a brake fluid catch container partially filled with brake fluid.
- Pump the Brake Pedal:
- Have a helper sit in the driver’s seat, press the brake pedal slowly and firmly several times, then hold it down.
- Open the Bleeder Valve:
- With the brake pedal depressed, open the bleeder valve using the appropriate wrench.
- You should see old brake fluid and air bubbles flowing into the catch container through the tubing.
- Close the Valve:
- Instruct your helper to continue holding the brake pedal down while you close the bleeder valve.
- Repeat the Process:
- Repeat the bleeding process for each brake caliper in the following order: rear passenger side, rear driver’s side, front passenger side, front driver’s side.
- Always check and refill the brake fluid reservoir to prevent it from running dry.
- Check Brake Fluid Level:
- After bleeding all calipers, check the brake fluid level in the reservoir and top it off as needed.
- Test Brakes:
- Lower the vehicle, start the engine, and gently press the brake pedal to ensure it feels firm and responsive.
- Dispose of Old Fluid:
- Dispose of the old brake fluid responsibly by taking it to a local recycling center or hazardous waste collection site.
Flushing brake fluid is a critical maintenance task that helps maintain your vehicle’s braking system’s integrity. If you’re not confident in performing this procedure yourself, you should seek assistance from a professional mechanic.
Frequently Asked Questions [FAQs]
1. What are the causes of brake fluid becoming dirty?
The contamination with dirt and dust particles can be caused by a lack of care in cleaning the brake system. The water content in the brake fluid can be increased due to a leak in the hydraulic system or because condensation has occurred when braking heavily.
2. What are the symptoms of dirty brake fluid?
The symptoms of dirty brake fluid can vary depending on the type of fluid and how dirty it is. The most common symptom is a decrease in stopping power. If you are experiencing a decrease in your car’s stopping power, it might be time to check your brake fluid. Dirty brake fluid can cause several problems, including insufficient stopping power and the pedal feeling spongy or soft.
3. Should I flush my brake fluid with a different fluid type?
Some might think changing the brake fluid to a different type can improve brake performance. But, in reality, this is not true. This can even cause problems like corrosion and contamination of the system.
4. What is the difference between DOT 3 and DOT 4 brake fluid?
Brake fluid is a hydraulic brake system’s lifeblood. It’s what keeps the whole system running smoothly. DOT 3 and DOT 4 are two different types of brake fluids that are used for different purposes. DOT 3 is an old type of brake fluid used on most cars before the 1980s, when it was replaced by DOT 4 due to its poor performance in cold weather. Some people still use it as a cheap alternative to DOT 4.
CONCLUSION
Understanding the signs and knowing how to change your brake fluid is crucial for maintaining the safety and function of your vehicle. The process may take a little time and patience, but it’s a task well worth undertaking. Regularly flushing your brake fluid can extend the lifespan of your vehicle and give you peace of mind when you’re on the road. Remember, safety always comes first.