
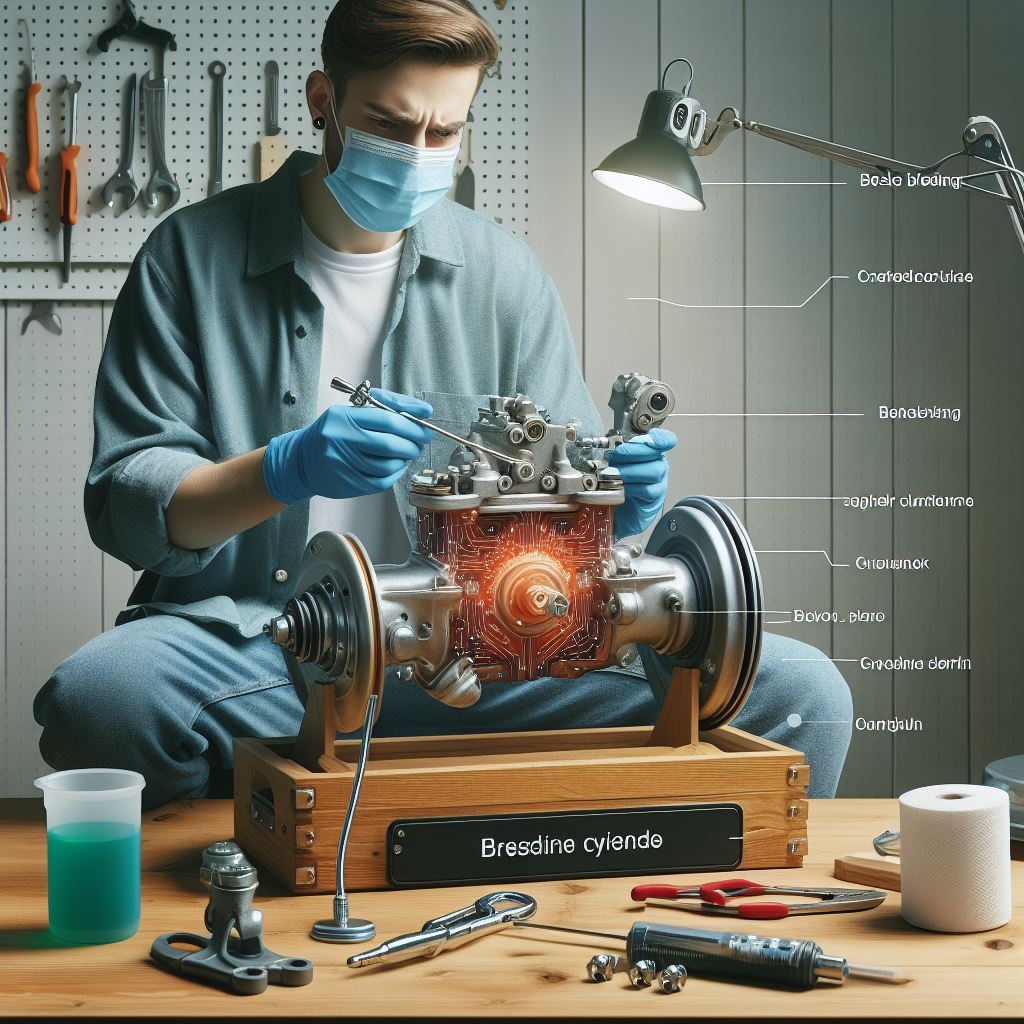
Bench Bleeding Your Master Cylinder: A Step-By-Step Guide
A master cylinder is a device that allows hydraulic pressure from a vehicle’s power steering system to be applied to the brakes. The master cylinder contains two chambers separated by a piston. When the driver presses down on the brake pedal, the piston moves into the chamber containing fluid under high pressure. This forces the fluid out of the other chamber through a valve, causing the brakes to apply. When the master cylinder has been sitting unused for some time, the seals inside can become worn or damaged. If this happens, the fluid in the master cylinder can leak out, called a ‘bench bleed.’
Table of Contents
What is Brake Bleeding?
The process of brake bleeding involves getting rid of air bubbles in your brake system. These air bubbles are trapped in the lines and hoses and cause the brakes not to work properly. All brake jobs begin with the removal of the old parts and cleaning everything up. Then, it’s time to get ready to install new parts.
After bleeding the brakes, the next step is to bleed the system. By pumping the brake pedal, you stop the brakes from squeaking and have them work again. Brake bleeding is done using a special tool called a brake bleeder.
What is the purpose of bench bleeding a master cylinder?
- To bench-blend, a master cylinder, insert a piston into the cylinder, then press the pistons with a hydraulic press. This allows the cylinder to be reused.
- Bench bleeding a master cylinder is an effective way to remove air bubbles from the system.
- Despite the power booster actuating the piston only partially, the air is still trapped in the passages after bleeding the master cylinder.
- CPP’s brake bleeding kit helps simplify and prevent cross-contamination by using old plugs or fittings.
- When bleeding a master cylinder, the bench bleeding tool keeps the proportioning valve in place.
- Bench bleeding a master cylinder makes the process easier.
How to Bench Bleed Your Master Cylinder?
- Bleeding a master cylinder is necessary to ensure proper brake function.
- The Wilwood bleeder kit can be purchased separately or included with the master cylinder.
- Bleeding should be done using a screwdriver and brake fluid while keeping the ends of the tubes submerged.
- Bleeding the master cylinder is necessary to ensure proper braking performance.
- The depth correction plug must be installed when bleeding the master cylinder.
- A new master cylinder should be installed with new fittings, reservoirs, and gaskets.
- Tighten screws in a cross pattern only “finger-tight.”
- Bench bleeding is a technique to remove air from the master cylinder.
- Bleeding the master cylinder will reduce pressure and prevent brake fade or lockup.
- In a summary, first, you need to disconnect the air hose and remove the top cover of the master cylinder. Then, you will need to remove the two bolts that hold the top cover in place.
- Once the bolts are removed, you can lift the top cover off of the master cylinder. Now, you will need to remove the two cap screws on the bottom of the master cylinder.
- Next, you will need to remove the top cap. You will also need to remove the two bolts on the bottom of the master cylinder. Then, you can remove the bottom cap.
- Finally, you can remove the air hose from the master cylinder.
Get all the air bubbles out of your brakes by blowing them out
Bleeding a brake system can be done in two ways – the bench bleed method or the pump-pump method. Bench bleeding is a faster and more efficient way of bleeding brakes, but it must be done on a workbench. To remove air bubbles from brake fluid:
- If necessary, repeat steps 2 and 3 several times until all of the air bubbles are gone.
- After removing all of the air bubbles, fill the reservoir back up to its original level.
- Remove the bleed screw cap located at the bottom of the reservoir.
- Insert the end of the hose into the bleed hole and push down firmly.
- Turn the bleeder knob clockwise until the bleeder stops.
- Let the air escape slowly through the bleeder hole.
- Repeat steps 1-5 until no air escapes.
- Once the air has been removed, tighten the bleed screw cap.
Secure the Master Cylinder in a Vise
- To bleed a new Wilwood master cylinder, mount the cylinder in a vise and clamp one of its dog-ear mounts.
- Be sure to level the master cylinder so the fluid will leave and refill properly during bleeding.
- Fill both sides of the reservoir with brake fluid, then insert a screwdriver into the bore to compress the piston.
- Bleeding the brake system
- Securing the master cylinder in a vise
- Reinstalling fittings and the diaphragm gasket
- The screws should be tightened only to finger tightness in a cross pattern
Prep With the Bleeding Kit
- Many replacement master cylinders come with a bleeding kit.
- Feel free to skip the bleeding kit if you do not have one or do not wish to use it. Another simpler method can be utilized instead.
- Bleeding brakes can be done in your car or on your workbench.
Bleed out the Air Bubbles With the Kit (Or Without It)
- You should top off the brake fluid in the reservoir.
- Either way, bleeding occurs the same regardless of whether a kit is used.
- Screw the reservoir top onto the reservoir and replace the little caps
- To replace the little caps, screw the top onto the reservoir.
- The new master cylinder is ready for installation.
- When buying the replacement master cylinder, make sure it comes with the priming kit.
- Pump the piston to remove air from the master cylinder
- Connect a piece of clear tubing to each fitting on the reservoir and run it into a jar of brake fluid
- Bleed brakes all around
- To test the free play of the rod, the hand brake adjustment, and the brake adjustment bar, you need to remove the hand brake lever.
- Bench bleed master cylinder with vacuum pump.
- A bench bleeds master cylinder can be bled using a vacuum pump.
- This procedure is time-saving and can help avoid bleeding the master cylinder on customers’ vehicles.
- Visit Garage Gurus for on-demand videos and online tech tips from the Master Technicians of Garage Gurus.
- Bench bleed is a problem where the brake fluid leaks from the master cylinder.
- A vacuum pump can remove the air from the system and fix the bench bleed.
- When in doubt about your car’s braking system, consult a certified technician or mechanic.
How to bench bleed a Chevy master cylinder?
- Bleeding the master cylinder before installation is very important to ensure all air has been purged.
- Separately, Wilwood offers bleeder kits.
- Removing all prepackaged contents from the kit and within the master cylinder should be done carefully.
- To bleed a Chevy master cylinder, fill the reservoir with brake fluid and a screwdriver and insert bleeding tubes into the ends of the tubes.
- Pump the air out of the master cylinder with a screwdriver.
- Reinstall fittings and top off reservoirs.
- Install diaphragm gasket and billet lid with Allen screws
- To bleed a Chevy master cylinder, tighten screws in a cross pattern no more than finger-tight.
- Bleed the master cylinder by turning the bleeder screw until fluid comes out of the brake pedal.
- If you have an ABS, wait 10 minutes before driving to allow the system to reset.
- Check your brake fluid level and replace if necessary.
How to bench bleed a C5 Corvette clutch master cylinder?
- A bench bleeding kit is necessary to install a new or replacement clutch master cylinder in a Corvette.
- To bench bleed the clutch master cylinder, remove all packaged contents, and mount the master cylinder in a vise.
- Connect the bleeder tubes to the outlet ports on the master cylinder nipple and secure them with clips.
- Remove the bleeder screws from a C5 Corvette clutch master cylinder and insert a screwdriver into the bore.
- Force air out of the bore with a slow and steady motion, then top off both reservoirs with brake fluid.
- Reinstall the bleeder screws and tighten the lid on the new master cylinder.
- Tighten screws in a cross pattern no more than finger-tight.
- A C5 corvette clutch master cylinder is bench bleeding by removing the cap, allowing the fluid to drain from the slave cylinder, and tightening the bleed screw.
How to bench bleed a 3 port master cylinder?
- This video tutorial demonstrates how to bench bleed a new Wilwood tandem aluminum master cylinder.
- The bleeder kit can also be purchased separately.
- Carefully remove all prepackaged contents from the kit and within the master cylinder.
- Depress the master cylinder with a slow and steady motion, and then fill both sides of the reservoir with brake fluid.
- Install the master cylinder by inserting it into a power booster, making sure to insert the depth correction plug if necessary.
- To bench bleed a 3 port master cylinder, install fittings top-off reservoirs, and attach the diaphragm gasket.
- Finish by installing the billet lid with four Allen screws.
- To bleed a 3 port master cylinder, tighten the screws in a cross pattern no more than finger-tight.
- Release the bleed screw one turn at a time and monitor the pressure gauge until it stays within limits.
When bleeding has stopped, replace all air bleeder caps and tighten all screws to manufacturer specifications.

How to bench bleed a 2006 Mazda 3 master cylinder?
- In addition, Wilwood bleeder kits are also available separately.
- When this procedure is performed, it’s important to keep the ends of the bleeding tubes submerged in the brake fluid.
- Bleed the brakes by depressurizing the system
- Check for leaks and correct them.
- Fill the reservoirs with brake fluid.
- Install the diaphragm gasket and attach the billet lid
- To bleed the master cylinder, tighten screws in a cross pattern no more than finger-tight.
- To ensure proper bleed, pump the brake pedal and let it go gradually while watching the brake fluid level.
- Refill with fresh brake fluid as needed.
How to bench bleed a 1989 Toyota master clutch cylinder?
First, bleed the bleeder valve on the proportioning valve below the clutch master cylinder on a 1989 Toyota. Alternatively, bleed the calipers or wheel cylinders at each wheel if your proportioning valve does not have a bleeder valve. The vehicle should be lifted and supported with jack stands under the frame.
- Remove the wheels and tires.
- Bleed the wheel nearest the master cylinder by following the above instructions.
- Move to the next closest Wheel and bleed it using the same process used on the Master Cylinder.
- The same method as before should be used to bleed the rear wheels.
- Reinstall wheels and tires.
- Lower vehicle.
- Bench bleeding a 1989 Toyota Master Clutch Cylinder is necessary to remove air, fluid, and debris from the clutch mechanism.
- A wrench set, brake fluid, clear plastic tubing, and a plastic or glass container are needed for this task.
- Bench bleeding can be done by replacing the clutch cylinder or by bleeding it using clear plastic tubing.
- Bleeding should be performed regularly to keep the clutches working properly and prevent wear and tear on the parts.
- To bleed a clutch cylinder, you’ll need to remove the cover and the pressure plate.
- You’ll need to bleed the clutch by opening and closing the bleeder valve several times.
- Make sure you keep an eye on the level of coolant in the reservoir as you do this.
- Bleeding a clutch can be tricky, so take your time and don’t force anything!
How to bench bleed a 1967 Corvette master cylinder?
Before installing a new master cylinder, ensure all air is purged internally from the new master by bleeding it on a bench. It is often nearly impossible to bleed the internal air pockets from a new master cylinder once it has already been installed on a vehicle.
To bench bleed a 1967 Corvette master cylinder, remove the bleeder valves first. Fill the brake fluid reservoir up about 3/4 full with a fresh bottle of brake fluid. Slowly and steadily depress the piston with a screwdriver inserted into the master cylinder bore. Air will be forced into the fluid reservoir from the master cylinder bore.
Tighten the new master cylinder lid while keeping ends submerged in brake fluid.” Using a cross pattern, tighten the screws as much as you can with your fingers. Bench bleed a 1967 Corvette master cylinder by removing the cap and using a syringe to depress the plunger until fluid comes out. Replace the master cylinder if there is excessive fluid loss or if noise is present when driving.
How to bench bleed a master cylinder without a kit?
- There is an easy way to avoid the need to bleed a master cylinder, even if it seems like it would take forever.
- Bench bleeding means bleeding the master cylinder on your workbench removed from your car.
- Installing a new master cylinder requires bleeding your brakes. Otherwise, you’ll need to use the pump-pump method.
- Remove the brake fluid cap.
- Screw in the bleeder screw until it bottoms out against the vise.
- Insert a wooden or plastic dowel (rod) into the bleed screw and hold onto it tightly while you turn the bleed screw counterclockwise with your hand.
- Bleeding the master cylinder should stop when there is no more fluid coming out of the bleeder screw.
- Replace the brake fluid cap before driving your car again to avoid any accidental leaks.

How to bench bleed a master cylinder with bleeder screws?
- Each Wilwood tandem aluminum master cylinder includes fittings and hoses for proper bleed.
- Bleeder screws are used to force the air out of the bore of the cylinder, and the ends of the bleeding tubes must remain submerged in brake fluid.
- When installing a new master cylinder, insert a depth correction plug.
- Then, bleed the system by depressing the bleeder screw until the system is free of air.
- If there are leaks, make sure they are repaired.
- Reinstall fittings and top off reservoirs.
- Install the diaphragm gasket and billet lid.
- Tighten screws no more than finger-tight.
- Use a cross-pattern
- Bleed the master cylinder
How to bench bleed a master cylinder on the car?
To bench bleed a master cylinder, prepare the vehicle and position the hard lines to accept a fully bled master cylinder. Wilwood offers bleed kits to assist with bench bleeding. If you’re replacing or installing a master cylinder or performing routine full-bleed procedures, Wilwood has brake fluid to suit your needs.
How to bench bleed a master cylinder without a vice?
- A tandem master cylinder can be bled successfully by following these steps:
- Wilwood offers bleed kits to make this process easier.
- To bench bleed a master cylinder, use a brake fluid that meets your specific application requirements.
- Use new brake fluid if performing routine full-bleed procedures.
- Displacing air as fresh fluid is pumped into the chamber helps to ensure proper braking function.
- You will need a vice and tubing in order to bench bleed a master cylinder.
- First, loosen the clamp on the end of the tubing.
- Next, insert the other end of the tubing into the master cylinder’s bleeder valve (on the opposite side where you loosen the clamp).
- Finally, tighten both clamps to bleed air out of the master cylinder.
How to bench bleed a Ford clutch master cylinder?
During the installation of a new master cylinder, bench bleeding is necessary to ensure that all air is removed from the master. Bleeding can be done on your workbench and in your car. In my pickup, which needed a brake master cylinder, I decided to show how to bench bleed one before installing it. To bench bleed a Ford clutch master cylinder, you will need:
- A tube of silicone sealant
- A vacuum cleaner with a hose attachment
- An empty oil tank or container
- A funnel
- A crescent wrench or 10mm socket
Remove the cap and fill the oil tank or container with brake fluid. Turn on the vacuum cleaner and attach the hose to it. Pump the brake fluid until it reaches 100 psi (1,500 kPa). Then, pour half of the silicone sealant into the funnel.
Depressurize the tube by turning on your vacuum cleaner until all the air has been forced out of it. Then, release the brake fluid pressure and pour the remaining silicone sealant into the cylinder. Replace the cap and turn off your vacuum cleaner.
You can bleed a clutch master cylinder by loosening the bleeder screw on top of each clutch disk with a 10mm socket or crescent wrench. Turn it until all four screws are loose, then remove them.
Bleed each clutch disk using your funnel to pour brake fluid slowly over one end of the disk while turning it with a wrench. Reinstall everything in reverse order and torque all four bleeder screws to 25-30 ft-lbs (34-44 Nm).

Can you install a brake master cylinder without bench bleeding?
- Bleeding a brake master cylinder can be a long process and sometimes unsuccessful.
- Bench bleeding means you are bleeding the brake master cylinder on your workbench, removed from your car.
- You will need fresh brake fluid to bleed your brakes.
- You can install a brake master cylinder without bench bleeding if the workbench or table you are using is fixed and has a vise.
- If you have an optional Bleeding kit, it may be helpful to use it when bleeding your brakes.
Why is it recommended to bleed the master cylinder on a bench VS on the car?
Bleeding the master cylinder on a bench allows you to bleed the system without worrying about damaging the master cylinder or the lines. Bleeding on the car is very dangerous, especially when the car is moving because you cannot see what you are doing.
- Master cylinder installation can be difficult if the air is not properly purged from the piston chambers.
- To bleed a master cylinder on a bench, it is recommended to place it in a vice and has easy access to the piston chambers.
- If the master cylinder is installed at an angle inside an engine compartment, bleeding it on a bench will be futile.
- Bleeding the master cylinder on a bench is recommended to prevent air from entering the brake system.
- Bleeding the master cylinder on a car is not recommended as it can cause damage to the brake system and other parts of the vehicle.
- Bleeding the master cylinder on a bench is recommended to avoid fluid accumulation and damage to components.
By bleeding the master cylinder on the car, you avoid possible fluid contamination and component damage.
What happens if you don’t bench-bleed a new master cylinder?
If you don’t bench bleed the new master cylinder, you will have difficulty bleeding the brakes. If you don’t bench bleed the master cylinder, you will have trouble bleeding the brakes. If you don’t bench bleed the new master cylinder, you will have difficulty bleeding the brakes.
Bench bleeding is a method of bleeding a new master cylinder done on a workbench instead of in the car. Without bench bleeding, you have to use the pump-pump method, which can be time-consuming and unsuccessful.
If you don’t bench bleed a new master cylinder, the brake fluid will eventually seep out of the caliper and cause your brakes to stop working. Bench bleeding is a simple procedure that will prevent this from happening. If you do not bench bleed your new master cylinder, you risk having to replace it sooner rather than later.
Frequently Asked Questions [FAQs]
1. How do you bleed a master cylinder without bench bleeding?
If you do not have access to a workbench or vise, it is possible to bleed the master cylinder without bench bleeding. To do this, you will need two people and a container of fresh brake fluid. One person should be in the driver’s seat with their foot on the brake pedal while the other person stands outside the car and opens the bleeder valve on each caliper one at a time. The person in the driver’s seat should pump the brake pedal until all the air is purged from the system.
2. What tools are needed to bench bleed a master cylinder?
To bench bleed a master cylinder, you will need a vise, two wrenches, and fresh brake fluid. You will also need a container to catch any excess fluid that may come.
3. What is the difference between bench bleeding and bleeding the master cylinder?
Bench bleeding is when you have a master cylinder with too much pressure and need to release the pressure. Bleeding the master cylinder is when you take the fluid out of the master cylinder.
4. What should I do if I bench bleed a master cylinder?
If you bench bleed a master cylinder, you have to replace the fluid in the master cylinder. This is because the master cylinder needs to be filled with brake fluid, and it’s important to ensure it’s full.
5. How long will it take to bench bleed a master cylinder?
It depends on the master cylinder and how dirty it is. It can take 30 minutes to several hours to bench bleed a master cylinder.
6. How do I know if the master cylinder has been bench bled?
If the master cylinder is not bench-bled, then it will leak. Also, if you have to remove the top cover of the master cylinder, you will notice a small amount of fluid coming out of the valve when you remove the top cover. If the master cylinder has been bench bled, the fluid will always come out of the valve.
Conclusion
Here, we showed you how to bleed a master cylinder. To make sure that the fluid level in the master cylinder is correct, this process must be followed. When bleeding a master cylinder, you must first remove the air from the system, and then you must add new fluid until the piston stops moving. Finally, you must replace the cap and tighten it down. We hope you enjoyed our video! We are interested in hearing what you think.